
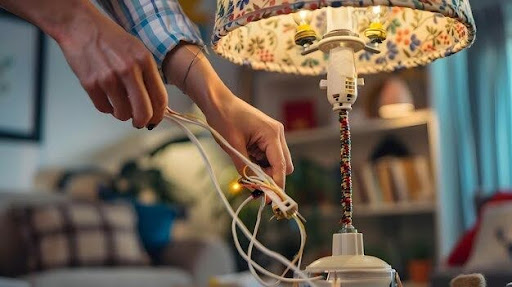
How to Make a Lampshade Without a Kit: Step-by-Step Beginner Guide
So, you’ve decided it’s time for a change. Maybe your current shade is looking a bit yellowed, or perhaps you’ve been hunting for lamp shades replacements and realized that nothing in the store quite matches that specific “vision” you have for your living room.
The good news? You don’t need to buy a fancy, pre-packaged kit to get the job done. In fact, learning how to make a lampshade without a kit is one of those DIY skills that feels like a superpower once you master it.
It’s cheaper, more creative, and surprisingly meditative. Grab a coffee, clear off the dining table, and let’s walk through how to build one from scratch.
The “Ingredient” List of Making a Lampshade Without a Kit
Since we aren’t using a kit, we have to be a bit resourceful. You likely have half of this stuff in your junk drawer already:
- Styrene (or a substitute): It is the plastic-y lining that makes the shade stiff. If you can’t find adhesive styrene, a heavy-duty poster board can work in a pinch!
- A Wire Frame: You can steal this from an old shade (just strip off the old fabric) or buy a bare frame online.
- Fabric: About a half-yard of something you love. Cotton, linen, or canvas works best.
- Binder Clips: Your best friends for holding things in place while the glue dries.
- Adhesive: A good quality spray glue and some double-sided “high-tack” tape.
How to Make a Lampshade Without a Kit: The Complete Process
Here is a step-by-step guide to make a lampshade without a kit:
Step 1: Strip It Down
If you’re working with lamp shade replacements in mind, start by taking your old, tired shade and carefully cutting away the fabric. You want to end up with two clean metal rings: the top ring (usually with the “spider” fitment that sits on the lamp) and the bottom ring.
Give them a quick wipe-down. If they’re looking rusty, a quick hit of metallic spray paint can make them look brand new.
Step 2: Create Your Template
It is the “make or break” part of how to make a lampshade without a kit. If your shade is a perfect cylinder (a drum shade), it’s easy, just a long rectangle. If it’s tapered (the “coolie” shape), you’ll need to do the “roll-and-trace” method.
Place your styrene or poster board on the floor. Start with the seam of the rings touching the edge and slowly roll the frame across the board, tracing the path of the top and bottom rings with a pencil. Add an extra inch at the end for the “overlap” seam.
Step 3: Fabric Meets Foundation
Iron your fabric until it’s perfectly flat. Any wrinkle now will be a permanent eyesore once the light hits it. Lay your fabric face down, give your styrene/poster board a light coat of spray adhesive, and press it onto the fabric.
Smooth it out from the center to the edges to avoid air bubbles. Cut the fabric, leaving about half an inch of “extra” material beyond the top and bottom edges of the plastic.
Step 4: The Big Assembly
This is where the binder clips come in. Apply your double-sided tape along the vertical edge of your plastic. Wrap the plastic into a circle and “dry fit” your metal rings inside. Once the rings are sitting flush against the top and bottom, peel the tape and seal the vertical seam.
Now, apply a thin line of glue or tape to the inside of the wire rings. Fold that extra half-inch of fabric over the wire and tuck it inside. Use the binder clips to hold the fabric tight against the wire while it sets.
Step 5: The Finishing Touch
Once everything is dry (give it at least an hour), remove the clips. If you want a professional look, you can glue a piece of matching ribbon or “bias tape” over the top and bottom rims to hide the raw edges.
Step back, flip the switch, and admire your handiwork. You just saved yourself a trip to the store and created something totally unique!
Wrapping Up
Learning how to make a lampshade without a kit is the ultimate shortcut to achieving a high-end, custom look on a budget.
It transforms a basic DIY project into a creative statement, allowing you to bypass generic store options for something truly one-of-a-kind. Once you’ve mastered these simple steps, you’ll never look at a bare lamp base the same way again!
FAQs
1. Is it safe to use poster board instead of styrene?
Yes, for most lamps. However, the poster board is opaque, so the light will only shine out of the top and bottom. Always use LED bulbs to ensure the paper doesn’t get too hot.
2. Where can I find wire rings for lamp shade replacements?
Check thrift stores for cheap, ugly lamps with sturdy frames. You can also buy individual “lamp rings” from craft stores or online hardware shops if you don’t want to strip an old one.
3. What is the best fabric for a beginner?
Go with a medium-weight cotton. It’s easy to glue, doesn’t fray excessively, and isn’t “slippery” like silk or polyester.
4. How do I get the “seam” to stay closed?
The vertical seam is the hardest part. Use a very strong double-sided tape (often called “red line tape”) or a specialized fabric glue and hold it with clips for at least 30 minutes.
5. Can I use hot glue for this project?
Avoid hot glue for the main assembly. It creates “lumps” that will show through the fabric when the light is on. A spray adhesive or liquid fabric glue gives a much smoother finish.
Stay in touch to get more updates & news on Juntosseguros!